Showing posts with label photoshop. Show all posts

Tuesday, August 6, 2013

Tutorial Tuesday | Walden Effect in Photoshop


Hey guys!  Nicole here and I am back with a fun Photoshop tutorial for you!  Have you caught on to my love of Instagram yet?  Well I have a new Instagram effect in Photoshop for you to try!  This tutorial assumes you have at least a basic knowledge of Photoshop, layers, and adjustments.  Are you ready to get started?

1. Start with your open photo in Photoshop.  Here is my BEFORE photo.  This is a pic from my cell phone, so nothing high quality about it, but a fun photo of my oldest son and me goofing around.  Nothing like some pink yoga pants to make you feel gorgeous!!!


2.  We are going to add a Curves adjustment layer.  I will take you step by step through the settings on your first Curves adjustment layer.
Starting with the RGB Curve. (first drop down)
Change your bottom corner input to 12.  Output will remain 0.  No change to your upper right input and output (they should be set at 255, 255)


Click on your RED curve (from the dropdown menu)
Your bottom left corner should be: Output 0, Input 10
and your upper right should be:  Output  255, Input 247

Click on the BLUE curve (from the dropdown menu)
Lower left:  Output 38, Input 0
Upper right: Output 203, Input 255


3.  Next we are going to add a LEVELS Adjustment layer.
We are going to change our Center slider under the histogram to 1.17
Change the Right slider to 233.
We are also going to change our output level to 57 and 255.


4.  Now we are going to add another CURVES layer.  This time we will only be adjusting the RGB curve.
You are going to adjust both the bottom left point, as well as adding a new curve point. (Add a point to your curve by clicking anywhere on your curve line and then typing in your input and output levels into the corresponding boxes below.
Lower left point: Output 0, Input 41
Add point on curve, type in: Output 124, Input 125


5.  Lastly, we are going to add a small gradient to the edges of our photo.  We will do this by adding a GRADIENT FILL layer.  Click on the Gradient bar in the Gradient Fill Menu.  This will open the Gradient Editor.  We will choose the option of black and white gradient.  The black point will be at the left of your gradient and the white to the right.  We want the opacity on the black side to be set to 100% and the opacity on the white (right) side to be set to 0% opacity.
We will move the right opacity slider (on the TOP of the gradient bar) to a location of 38, and make sure the opacity is 0%.
Click OK to get out of the Gradient Editor.
Next you are going to have your Gradient Fill menu open.  Change your Style to RADIAL.  Angle of 123-124 degrees.   And click REVERSE and ALIGN WITH LAYER.  Click OK.
Next change your LAYER STYLE to SOFT LIGHT.


AND VOILA!  You have an awesome Walden Effect on your Photo!!!  Check out the before and after photos one more time!!!  

If you LOVED this tutorial, please SHARE it, PIN it, TWEET it, or email us to let us know you loved it!!!  We love hearing from you!!!  Be sure to check out all our tutorials and news on FACEBOOK!!!!



Wednesday, July 17, 2013

Fresh & Fun Wednesday | Marathon, Photos, & Designs


Hey guys!!!  Nicole here!  So I did it.  I forked over a ridiculous amount of money and I am officially signed up for the IMT Des Moines Marathon.  The. Whole. Thing. 26.2 miles.  YIKES!  This is my FIRST marathon ever!  I have done 1/2 marathons before, but this is like the big one.  The one thing on my non-existent bucket list....that would be on said-bucket list if I had one.  Something I have wanted to do for a LONG time...but never have.  Sooooo keep me motivated until October and share with me your marathon stories, encouragement or if you are running this marathon or ANY marathon or races (long or shorter) this year tell me about it!!!  We can keep each other motivated!!!!
And speaking of motivated....(did you like that goofy segway)...... we have been UBER motivated this week with photography and design projects....here is a recap of our last few projects and what's been going on at Urban Wings Art!!!

PHOTOGRAPHY FRESH & FUN:

Cake smash birthday photoshoots.  Family photoshoots.  Kiddo photoshoots.  Lots of pictures being taking recently.  But even more than that we have had LOTS of requests for our Photography Books and Photo Canvases.  If you haven't seen these or heard about them yet, they are GOR-ORGEOUS!!!  We are working on lots of designs for our photography clients for coffee table books that we are SO excited for them to see and display!  Plus we have designs coming along for some out of state clients who sent us THEIR photos for a wall canvas!  WE DO THAT TOO!!!  We love helping you create ART for your homes!  If you have a photography/art project, please inquire with us and we can give you a personalized quote!!!


DESIGN FRESH & FUN:
Some great new products are hitting the Creative Pixel store this week!!!  Here are a few to whet your appetite!


And here are some recent amazing layouts that were recently created by the Creative Pixel members with some of our products:


And we have also been busy doing some graphic design projects!  Some cute invites lately!  Here is a little peek at one of our recent designs for a bridal shower!


Hope you guys enjoyed seeing what the Urban Wings Girls have been up to!!!  Please let us know if you have any questions at all or would like to chit chat about your design and photography needs!!!  Have an awesome day!!!!  COME LIKE US ON FACEBOOK FORMORE DESIGN AND PHOTOGRAPHY FUN!

Tuesday, July 9, 2013

Tutorial Tuesday | Saving for the Web


Hey guys!  Nicole here from Urban Wings Art, today I am going to share with you how to save your full sized, high-resolution photos and layouts for the web.  There are several reasons for doing this, but the two main reasons for sizing your photo/layout for the web are:

1.  UPLOADING!!  Many websites only allow small web-sized versions to be uploaded

2.  SAFETY!!  Web-sized versions of your layouts and photos look very poor quality when printed which will deter unauthorized print and usage of your layouts and photos.  PLEASE NOTE:  I still recommend watermarking all photography even at web-size.

So open up your full sized photo or psd file of your layout.  I am opening a layout that was originally created at 300ppi and 12 inches by 12 inches.
The first thing I want to do is go to IMAGE> IMAGE SIZE.


Change your Resolution first to 72 ppi.  And then change your width and height to 600 pixels per inch for a square layout.  Or if you are working with photos, I tend to keep my largest number (width or height) no larger than 1000.


Next go to FILE> SAVE FOR WEB AND DEVICES


Change your QUALITY until your file size is UNDER 125K.  Don't change any other settings.  Your drop down at the top should be on jpeg. 


Hit SAVE and a new web-sized version will be saved.  I name mine by the same file name as my full-resolution version with _web added to the end of the file name. 

Hope you enjoyed this tutorial and can't wait to see what you upload to the Creative Pixel and share with us!


Tuesday, July 2, 2013

Tutorial Tuesday | Completing for FIRST Digital Scrapbooking Layout in Photoshop


Creating Your First Digital Scrapbook Page in Photoshop CS5
By Nicole Young of Urban Wings Art
Making a digital scrapbooking page can be a lot of fun! This tutorial uses the Urban Destruction Graphics Pack available HERE in the Creative Pixel store!  Let's get started!!!

1. Open Adobe Photoshop CS5.  Create a new file. (File- New)

2. Enter the desired scrapbook page size into the boxes as shown below.  To create a 12 in by 12 in document,  enter a width of 3600 pixels, 3600 pixels for height and  300 pixels/inch for resolution.  Hit OK.


3. Open your photos (File – Open).  Browse your hard drive to find the photos you wish to include in your scrapbook layout.  Then click Open.  Hold down the control button while clicking to select multiple photos.  Your photos will open in the same workspace as your new file.

4. Open your graphics (File – Open).  Browse to find your desired graphics.  Hold down the control button while clicking to select multiple graphics.  The graphics will open in the same work space as the photos and new file.

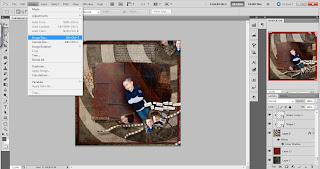
5. If the window is maximized, the active file will be the only one on the screen.  To see all of your files click on the Arrange Documents Button and choose Float All In Window.


6. Click on your new blank file to bring it to the top of the workspace.  This will be your layout file.

7. Then do the same with the background of your choice.

8. You can move the files around on the workspace by clicking and dragging on the top bar of the image window, using the Move Tool (the top tool in the Toolbar).

9. Using the Move Tool, click anywhere on the background file and drag the file onto the new blank image while holding down the SHIFT Key.  Holding the SHIFT key will “snap” your background into the center of your blank document.  You may now close the background file.  Since I am using the Welcome Kit that was created at 200ppi, I will need to resize the background to fit my new document.  I will hit Ctrl + T to Transform my document.  I then hold down the SHIFT key and drag the corners out until I hit the corners of my blank document.  This will keep the ratio of the background and not stretch it.
 
10. Click on your first photo.  Using the Move Tool, click and drag it onto your layout.

11. If you would like to resize your photo.  Hit Ctrl + T (transform) to resize and rotate your photo.   Always hold down the SHIFT key when resizing (clicking and dragging one of the side or corner boxes) to keep the correct aspect ratio of your photo.

12. If you wish to rotate your image, hover your mouse outside the corner of your image.  You will see a small set of arrowed angles appear.  Click and drag to rotate your image in any direction.  Hit Enter to turn your Transform tool off and accept your changes.

13. For a scrapbook layout to look realistic, add a drop shadow to your photo with a Layer Style.  To open the layer style box, you can double click on the layer you want to add the style to, or click on the fx button at the bottom of the layer palate, and select drop shadow.


14. Click on the box that says “drop shadow” and adjust the settings to get your desired shadow.    Most graphics from the Creative Pixel come complete with an appropriate drop shadow and need no extra shadow added unless "no shadow" is specified on graphics packaging.  Remember to add shadows to each of your photos for realism.


15. Now click on the element you wish to add to your layout.  Using the Move Tool as before, click and drag it onto your layout and position where you desire.

16. Repeat this procedure with any additional photos or embellishments you wish to add to your layout.   Each item will be added in its own layer automatically in your layout file.

17. You can move any of the items in your layout at a later date by clicking on the relevant layer in the Layer palette to select that item.  You can also move any item above or below another item clicking on the relevant layer in the Layers palette and dragging it above or below another layer.


18. When you are happy with your layout, save your file (File – Save As) as a Photoshop file (.psd) with a unique name in a folder on your hard drive. This file will remain with all layers intact and you will be able to reopen and edit it at a later date.  You will also want to save (File- Save As) a jpeg file for printing (.jpg)  This file will be flattened and non-editable.


Did you enjoy the tutorial?  Come LIKE us on facebook HERE!!!  And come check out all our graphics packs and products available for scrapbookers and photographers HERE at the CreativePixel!!!
Scrapbook page created by Nicole Young of Urban Wings Art
Graphics from the Urban Destruction Graphics Pack by Nicole Young of Urban Wings Art
Adobe, the Adobe logo, and Photoshop CS5 are either registered trademarks or trademarks of Adobe Systems Incorporated in the United States and/or other countries.