


Hey guys! Nicole here
from Urban Wings Art, today I am going to share with you how to save your full
sized, high-resolution photos and layouts for the web. There are several reasons for doing this, but
the two main reasons for sizing your photo/layout for the web are:
1. UPLOADING!! Many websites only allow small web-sized
versions to be uploaded
2. SAFETY!! Web-sized versions of your layouts and photos
look very poor quality when printed which will deter unauthorized print and
usage of your layouts and photos. PLEASE
NOTE: I still recommend watermarking all
photography even at web-size.
So open up your full sized photo or psd file of your
layout. I am opening a layout that was
originally created at 300ppi and 12 inches by 12 inches.
The first thing I want to do is go to IMAGE> IMAGE SIZE.

Change your Resolution first to 72 ppi. And then change your width and height to 600
pixels per inch for a square layout. Or
if you are working with photos, I tend to keep my largest number (width or
height) no larger than 1000.

Next go to FILE> SAVE FOR WEB AND DEVICES

Change your QUALITY until your file size is UNDER 125K. Don't change any other settings. Your drop down at the top should be on
jpeg.
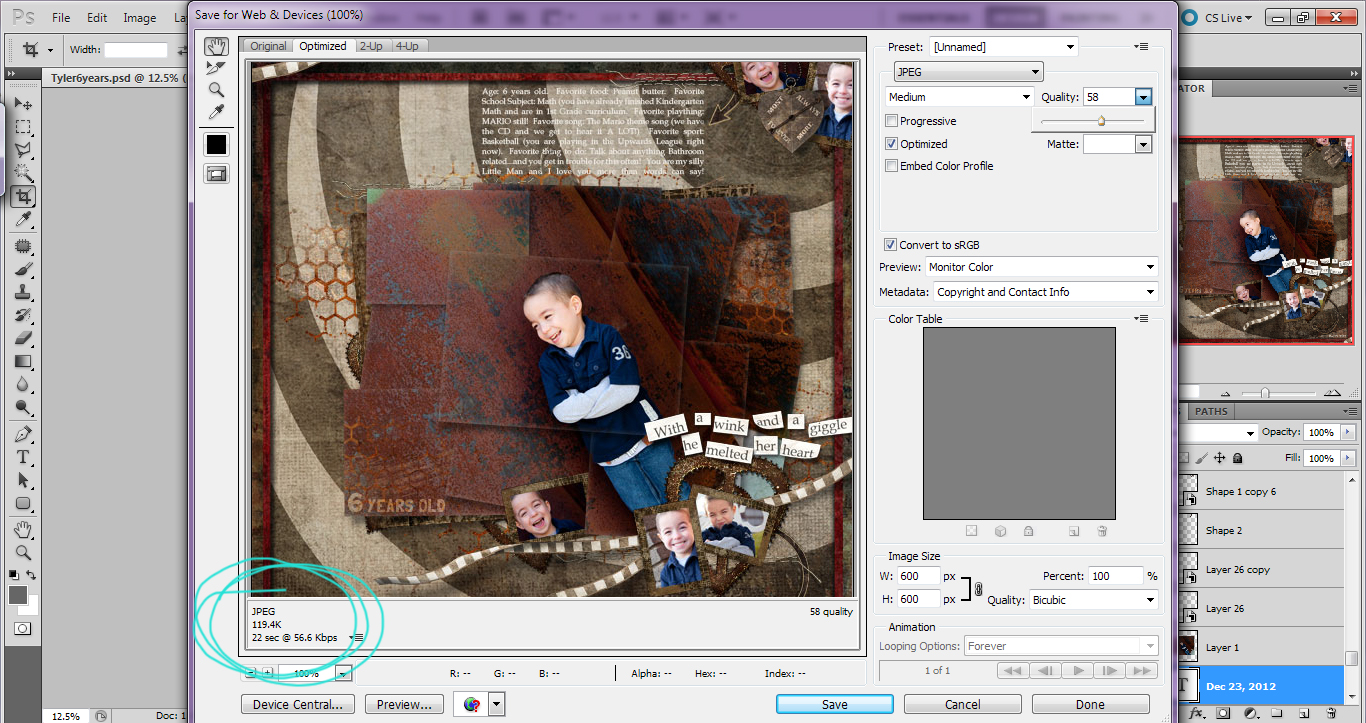
Hit SAVE and a new web-sized version will be saved. I name mine by the same file name as my
full-resolution version with _web added to the end of the file name.
Hope you enjoyed this tutorial and can't wait to see what
you upload to the Creative Pixel and share with us!
No comments:
Post a Comment